

How to modify Underworks Double Front Compression Shirts for more compression:
If you use the Underworks Double Front Compression Shirt, it can be more effective to "double it up" over your chest, in effect giving twice the compression. You'll need to hold it in place like that somehow, otherwise it will roll down and become uncomfortable and less effective as a binder. There are several ways of doing this, some more complicated than others.
Option One- Pin it up with safety pins placed near the arm holes of the shirt.
Option Two- Sew elastic straps on to what would be the bottom edge of the shirt, so that when you fold it up over itself, they work like shoulder straps to hold it up. (If you modify your own jock straps to use as packing pouches, the discarded leg straps work well for this.)
Option Three- A bit more complicated but very effective, comfortable and long-lasting solution is to do some cutting and sewing to permanently modify the binder. This option will probably only work well for small to medium sized guys, as it is much tighter than the others because the fabric comes up higher across your chest.
|
|
|
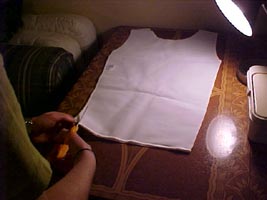
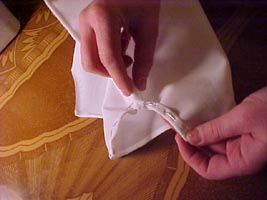
| 1. This is how the compression shirt should look when you begin. | 2. Make curved cuts out of the bottom corners of the shirt. Start your cut about .75" from the outside corner of the shirt, and finish the cut about 2" up on the side. | 3. Fold the edges of your new cuts over, and pin them in place to be sewn. |
|
|
|
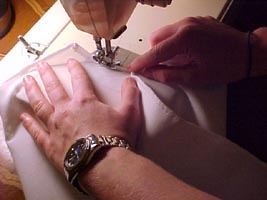
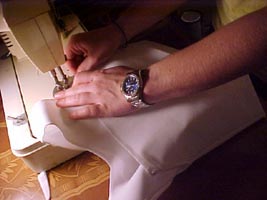
| 4. Sew the edges of your new cuts. This is important to make the shirt stronger and more comfortable, and to prevent if from unraveling. | 5. This is how the shirt should look at this point. Now, when the shirt is folded up, the cuts made out of the bottom will match up with the arm holes, allowing the folded part to come up higher on your chest, giving you more comfort and better compression. | 6. Fold the bottom of the shirt up and sew the bottom corners around the edges of the arm holes. It will help to pin things in place again before you try to sew it. Do not sew across the front or back of the shirt, only around the arm holes where the fabric overlaps. Don't worry if it looks like the inside layer is bunching up, that happens because the bottom (outside layer) of the shirt is more narrow than the top. It will smooth out once you put it on. |
|
|
|
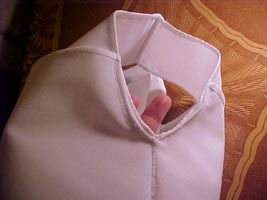
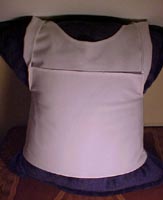
| 7. This is what the arm holes should look like once you're done sewing. | 8. The final product. It may be a little bit harder to put on the first few times, but it will loosen and get easier with time. The seams will be less visible if you wear the shirt with the seams on the inside (against your skin). |